
Getting Started with FastHire: A Complete Setup Guide
Rakesh · August 4, 2026 · 4 min read
FastHire gets you from account creation to your first AI-sourced candidate in about 10 minutes. This guide walks through every screen of the setup wizard — personal details, company profile, hiring needs, and plan selection — plus the four optional integrations you can safely skip on day one and connect later.
What you'll need before you start
A work email address (personal email domains like Gmail or Yahoo aren't accepted for signup)
Basic company details: industry, size, and location
About 10 minutes — every step except account creation and plan selection can be skipped and finished later from Settings
Step 1: Create your account
Go to app.thefasthire.com/signup/start and choose one of two ways in:
Enter your work email and a password (at least 8 characters, with a letter and a number), then select Continue with email.
Or select Continue with Google to sign up with your Google Workspace account and skip password creation entirely.
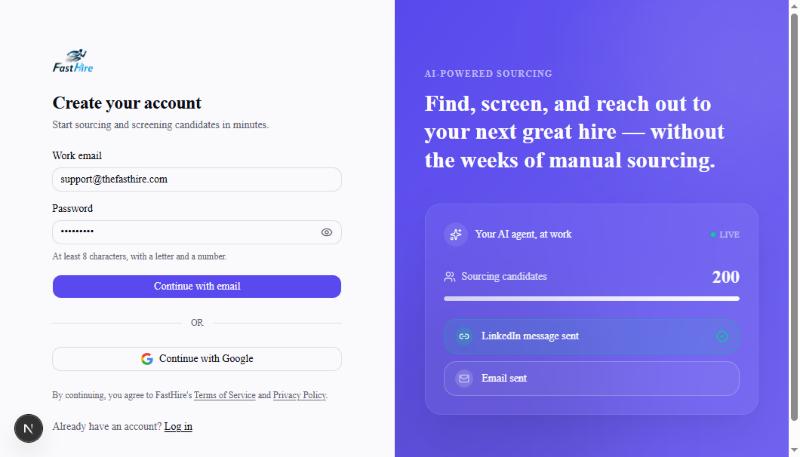
If you see an error saying your email domain isn't accepted, you're signing up with a personal email address — use your company email instead.
Step 2: Add your personal details
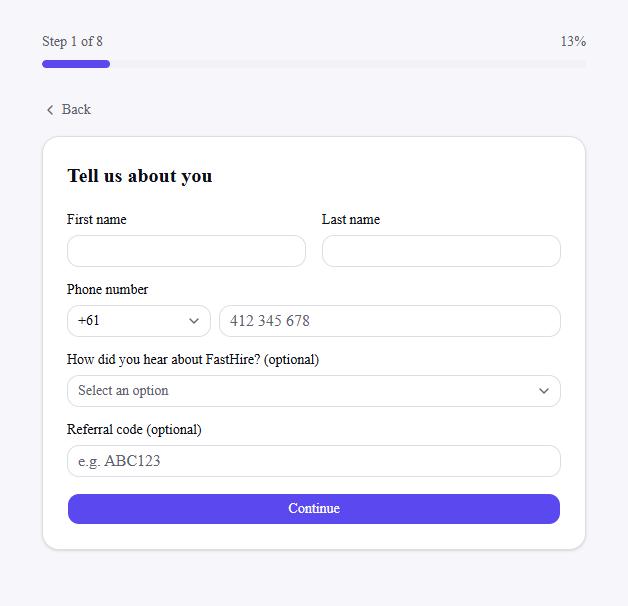
This is step 1 of 8 in the progress bar. Enter your first name, last name, and phone number (used for interview-reminder features later). "How did you hear about FastHire?" and a referral code are both optional — if someone shared a referral code with you, enter it here to apply any signup bonus.
Step 3: Tell us about your company
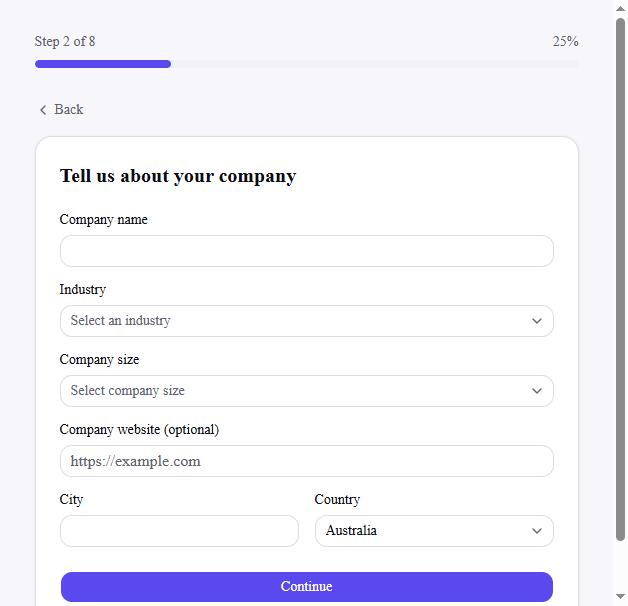
Fill in your company name, industry, company size, and location. Company website is optional. FastHire uses this to tailor onboarding suggestions and default currency/pricing — it doesn't require any integration or verification.
Step 4: Select your role
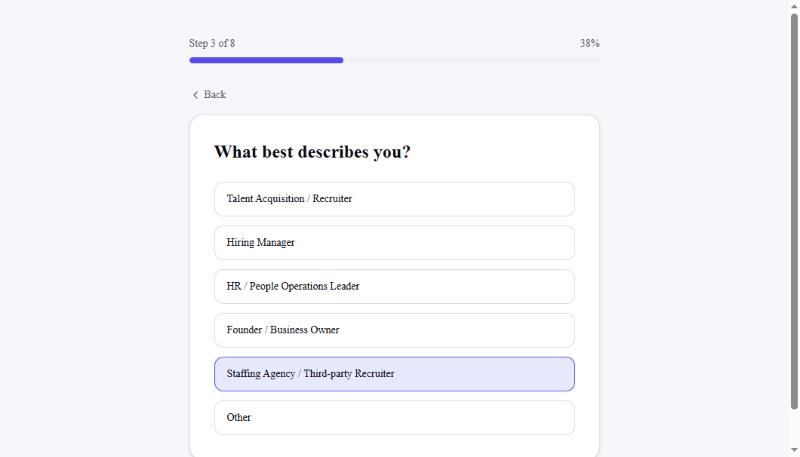
Choose the option that best describes you: Talent Acquisition/Recruiter, Hiring Manager, HR/People Operations Leader, Founder/Business Owner, Staffing Agency/Third-party Recruiter, or Other. This determines which dashboard defaults and terminology FastHire shows you first.
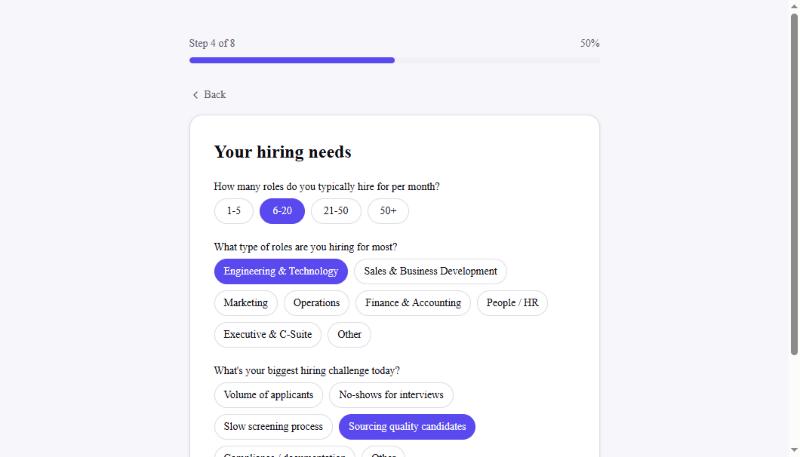
Step 5: Describe your hiring needs
Three quick questions calibrate FastHire's defaults to your hiring volume:
How many roles do you typically hire for per month? (1–5, 6–20, 21–50, or 50+)
What type of roles are you hiring for most? (Engineering, Sales, Marketing, Operations, Finance, People/HR, Executive, or Other)
What's your biggest hiring challenge today? (volume of applicants, no-shows, slow screening, sourcing quality candidates, compliance, or other)
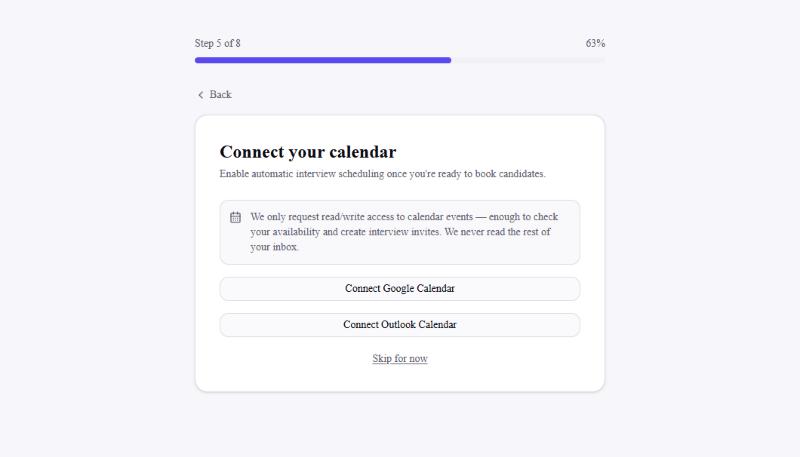
Step 6: Connect your calendar (optional)
Connecting Google Calendar or Outlook Calendar here enables automatic interview scheduling later — FastHire only requests read/write access to calendar events, never your inbox. If you're not ready to connect an account yet, select Skip for now; you can connect a calendar anytime from Settings → Connections.
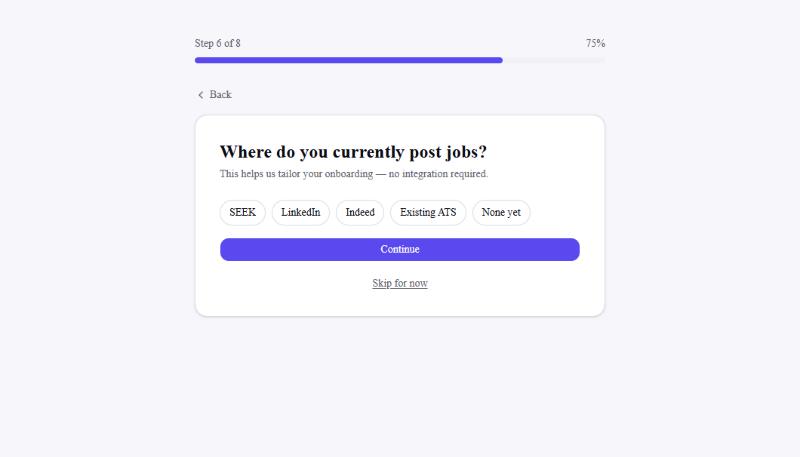
Step 7: Where you currently post jobs (optional)
Select any job boards you already use — SEEK, LinkedIn, Indeed, an existing ATS, or None yet. This doesn't create an integration; it just helps FastHire tailor onboarding tips. Skip it if you'd rather move straight to plan selection.
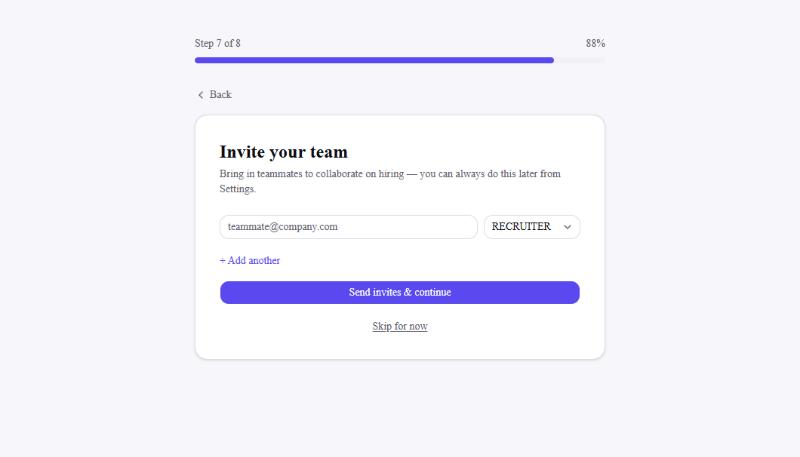
Step 8: Invite your team (optional)
Add a teammate's email and assign their role to send an invite immediately, or select Skip for now and invite people later from Settings → Team. There's no limit to how long you can wait before inviting your first teammate.
Step 9: Choose your plan
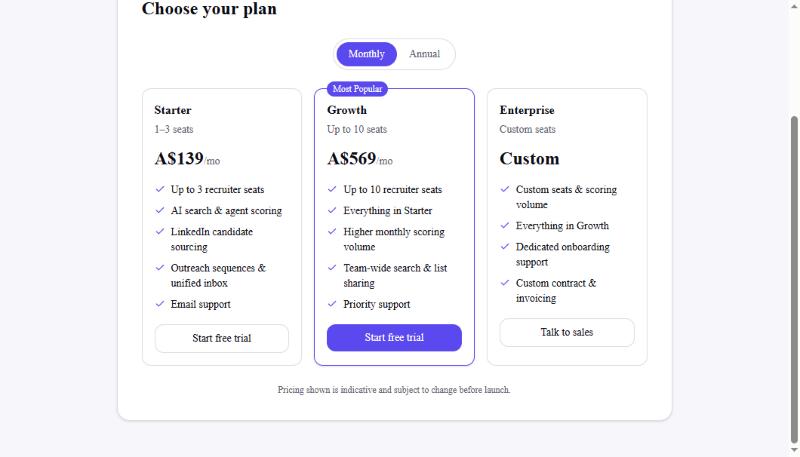
Compare Starter, Growth, and Enterprise side by side, toggle between monthly and annual billing, and select Start free trial on whichever plan fits your hiring volume — no payment method is required to start the trial. Need custom seats or volume? Select Talk to sales under Enterprise instead. Current pricing and plan limits are always visible on this screen and in Settings → Billing, since they can change over time.
You're all set
The final screen confirms your account is ready and suggests four places to go next: create your first search, explore your dashboard, invite your team, or connect your calendar. Select Go to dashboard to land in FastHire proper.
What to do next
Create your first candidate search from plain-language criteria or a pasted job description
Let the AI Sourcing Agent score and shortlist matching candidates
Build an outreach sequence from your shortlist and activate it
Frequently asked questions
Do I need a credit card to sign up?
No. Selecting Start free trial on any plan during setup does not require payment details.
Can I skip steps and finish them later?
Yes. Connecting a calendar, listing your job sources, and inviting your team are all optional during setup — every one of them is available afterward from Settings.
Why was my signup rejected with a personal-email error?
FastHire requires a work email address. Common personal domains (e.g. Gmail, Yahoo, Outlook.com) are blocked at signup — use your company email instead.
What if my company doesn't fit the listed industries or role types?
Select Other for industry, role type, or "what best describes you" — none of these choices lock you out of any feature.
Can I change my plan after signup?
Yes, upgrade, downgrade, or switch between monthly and annual billing anytime from Settings → Billing.